How to Create Interactive Meetings with R-Link | Video Conferencing Tips
How to Create Interactive Meetings with R-Link
Tired of meetings that feel like a one-way street? Buckle up, R-Link aficionados! We're about to turbocharge your virtual gatherings with the Button Bar Widget.
This little R-Link feature is your ticket to transforming mundane meetings into interactive spectacles that would make even the most jaded attendee sit up and take notice.
Understanding R-Link's Interactive Features
R-Link offers a suite of tools designed to boost engagement and collaboration. At the heart of these features is the Button Bar Widget, a versatile tool that turns your meetings into interactive experiences.
What is the Button Bar Widget?
The Button Bar Widget is a customizable set of buttons that you can add to your meeting interface. These buttons can link to resources or trigger any action you design, making your meetings more dynamic and participatory.
Step-by-Step Guide to Setting Up Interactive Elements
Let's dive into how you can set up and use the Button Bar Widget to create truly interactive meetings.
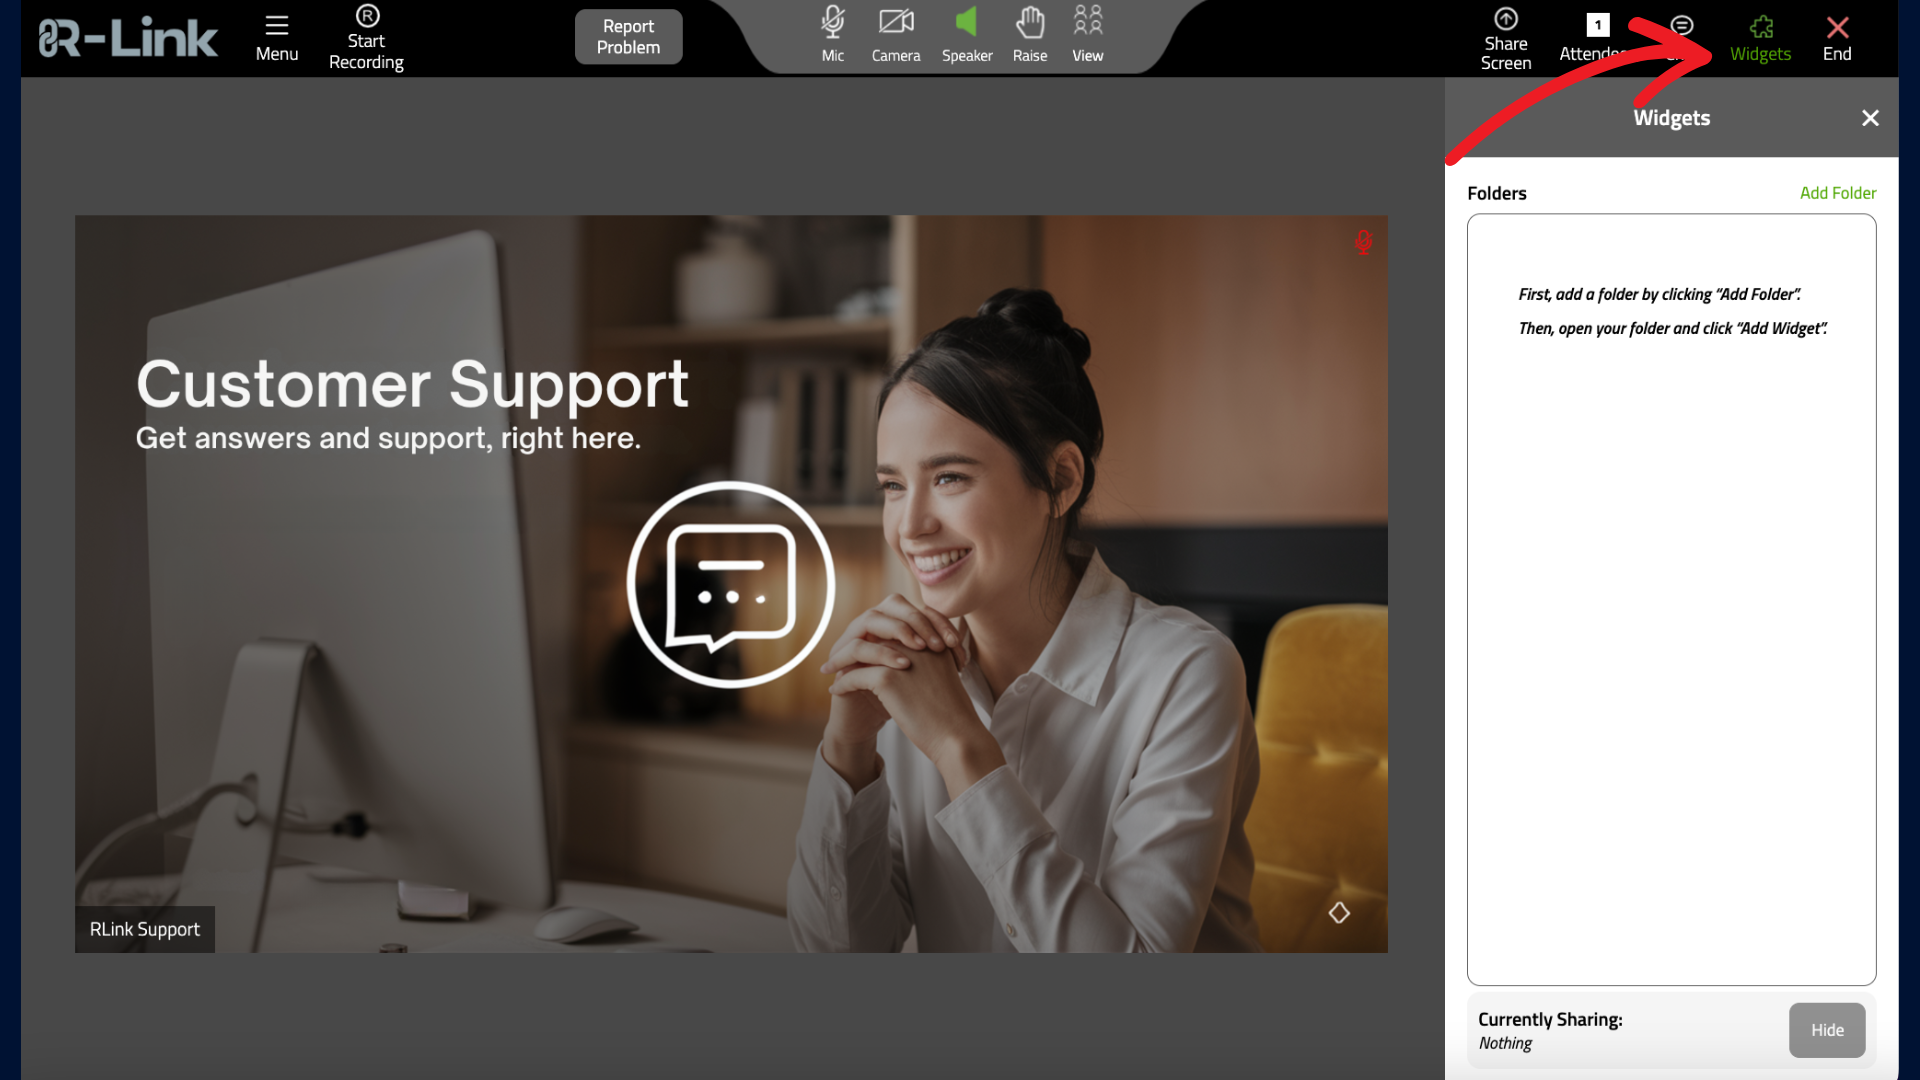
1. Access the Widget Sidebar
Open your R-Link meeting controls and click on the Widget Icon. This action unlocks a treasure trove of engagement tools at your fingertips.
2. Create a Folder
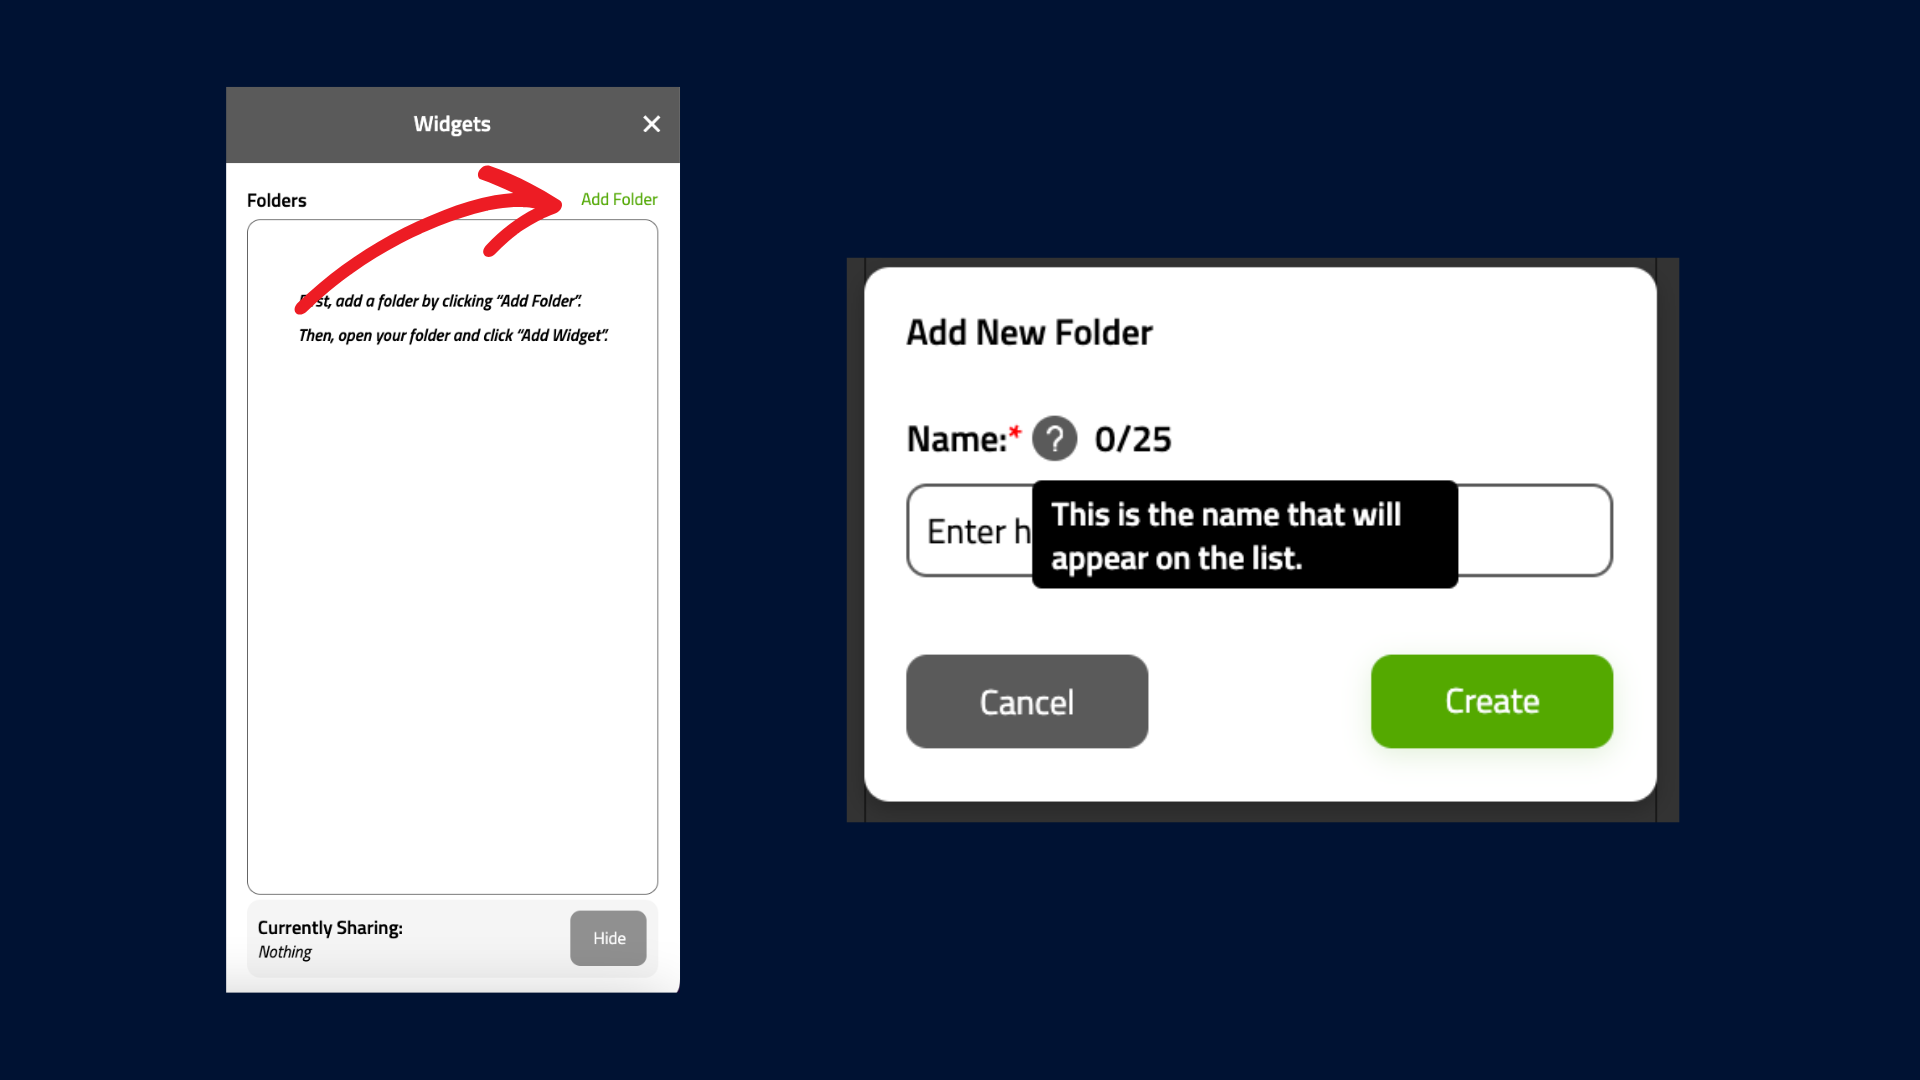
Click "Add Folder" and christen it with a name that pops. Keep it snappy - under 25 characters. We're aiming for "catchy conference call catalyst," not "War and Peace: The Meeting Edition."
3. Add the Button Bar
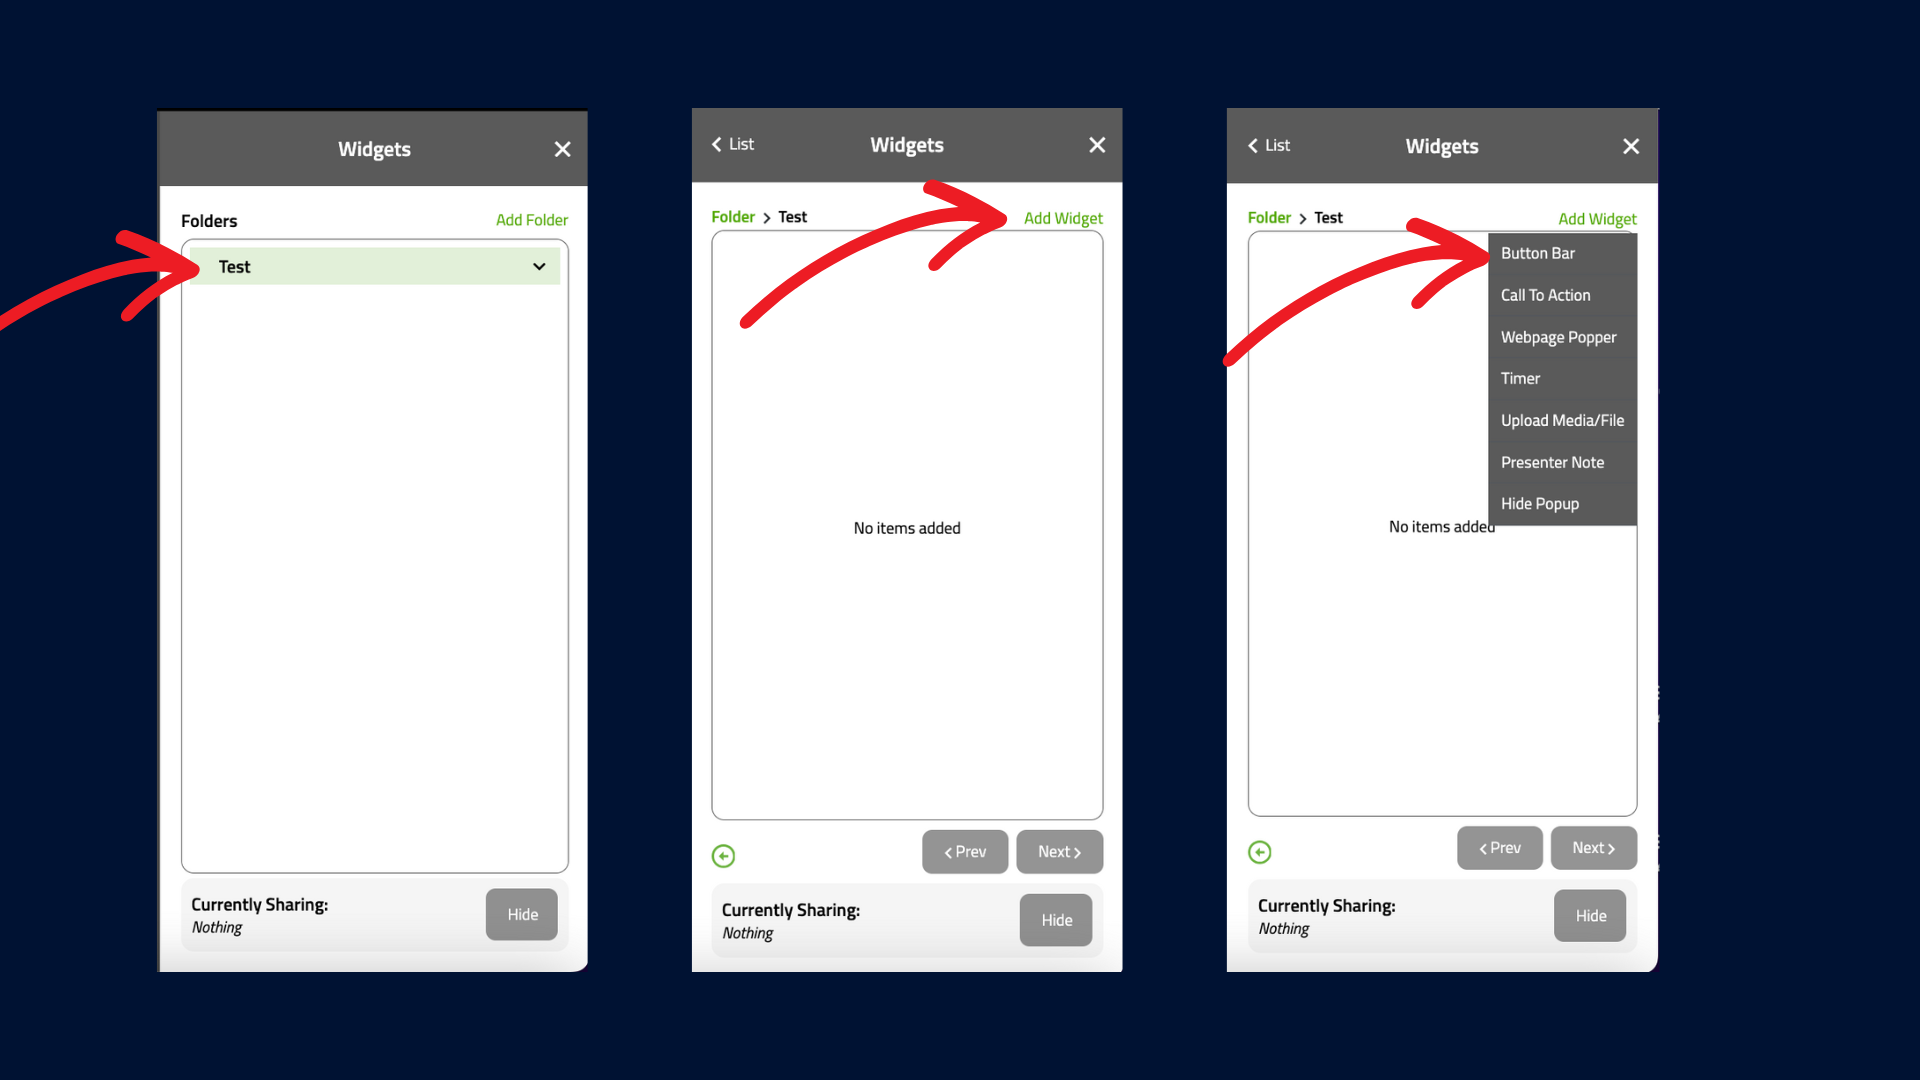
Now for the main event. Click your newly-minted folder, hit "Add Widget," and select "Button Bar." Congratulations! You've just armed yourself with the secret weapon of meeting engagement.
4. Customize Your Button Bar
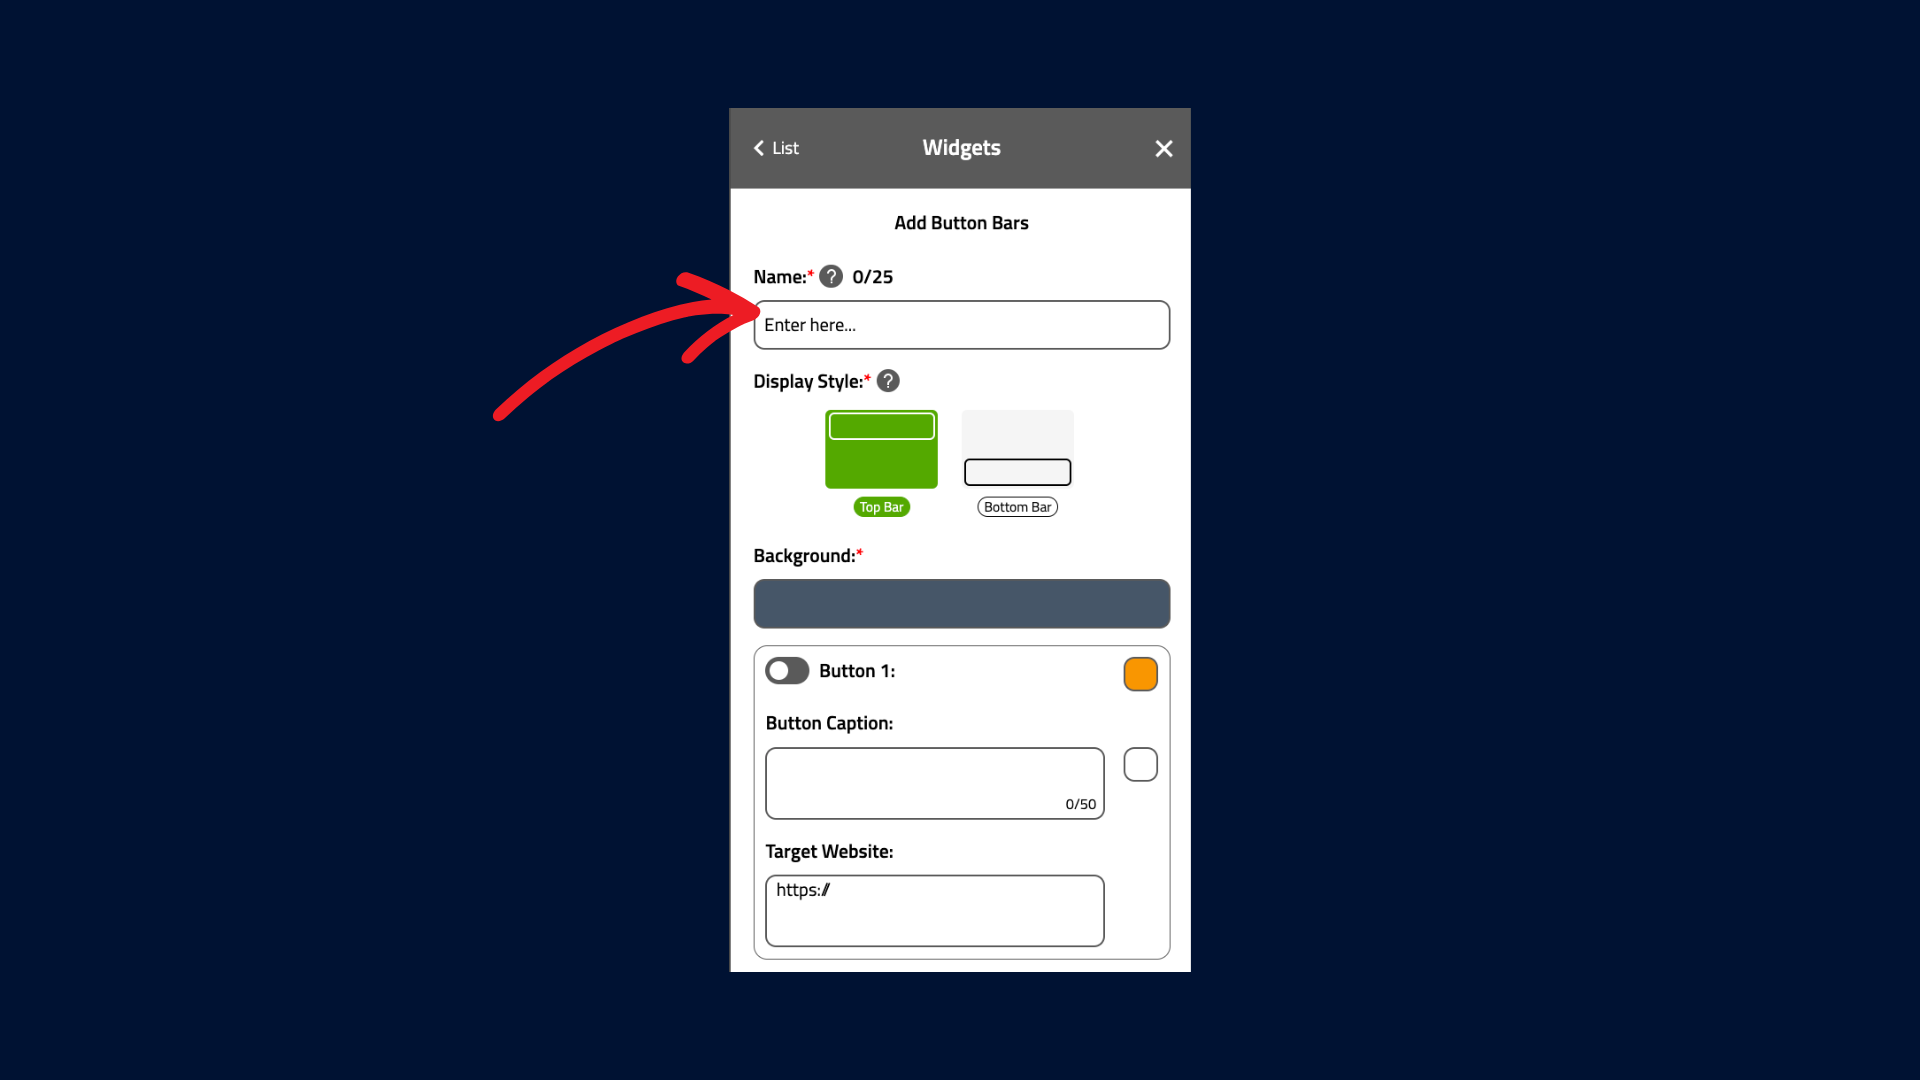
Name Game: Give your Button Bar a moniker that sizzles. "Boring Buttons" is about as appealing as day-old coffee.
Position Perfection: Choose between Top Bar or Bottom Bar. It's like deciding between a halo or a mustache for your meeting screen - both fabulous, but with different vibes.
Color Coordination: Pick a background color that complements your meeting theme. We're going for "stylish synergy," not "my eyes are bleeding."
5. Design Your Buttons
Select background colors for each button. It's like picking M&M colors, but for your meeting (and sadly, not edible).
Craft captions that are snappy and irresistibly clickable. You've got 50 characters to make your buttons more tempting than a "Skip Ad" option.
Set the target website for each button. Where will your digital portals lead? The possibilities are as endless as a blockchain!
You can add up to 5 buttons. It's like having a remote control for your meeting, minus the frustration of searching for it in your couch cushions.
6. Save and Fine Tune
Hit that "Save Widget" button. Voila! You can adjust as needed. You can easily hide, show, or tweak settings on the fly during your meeting.
Best Practices for Engaging Virtual Meetings
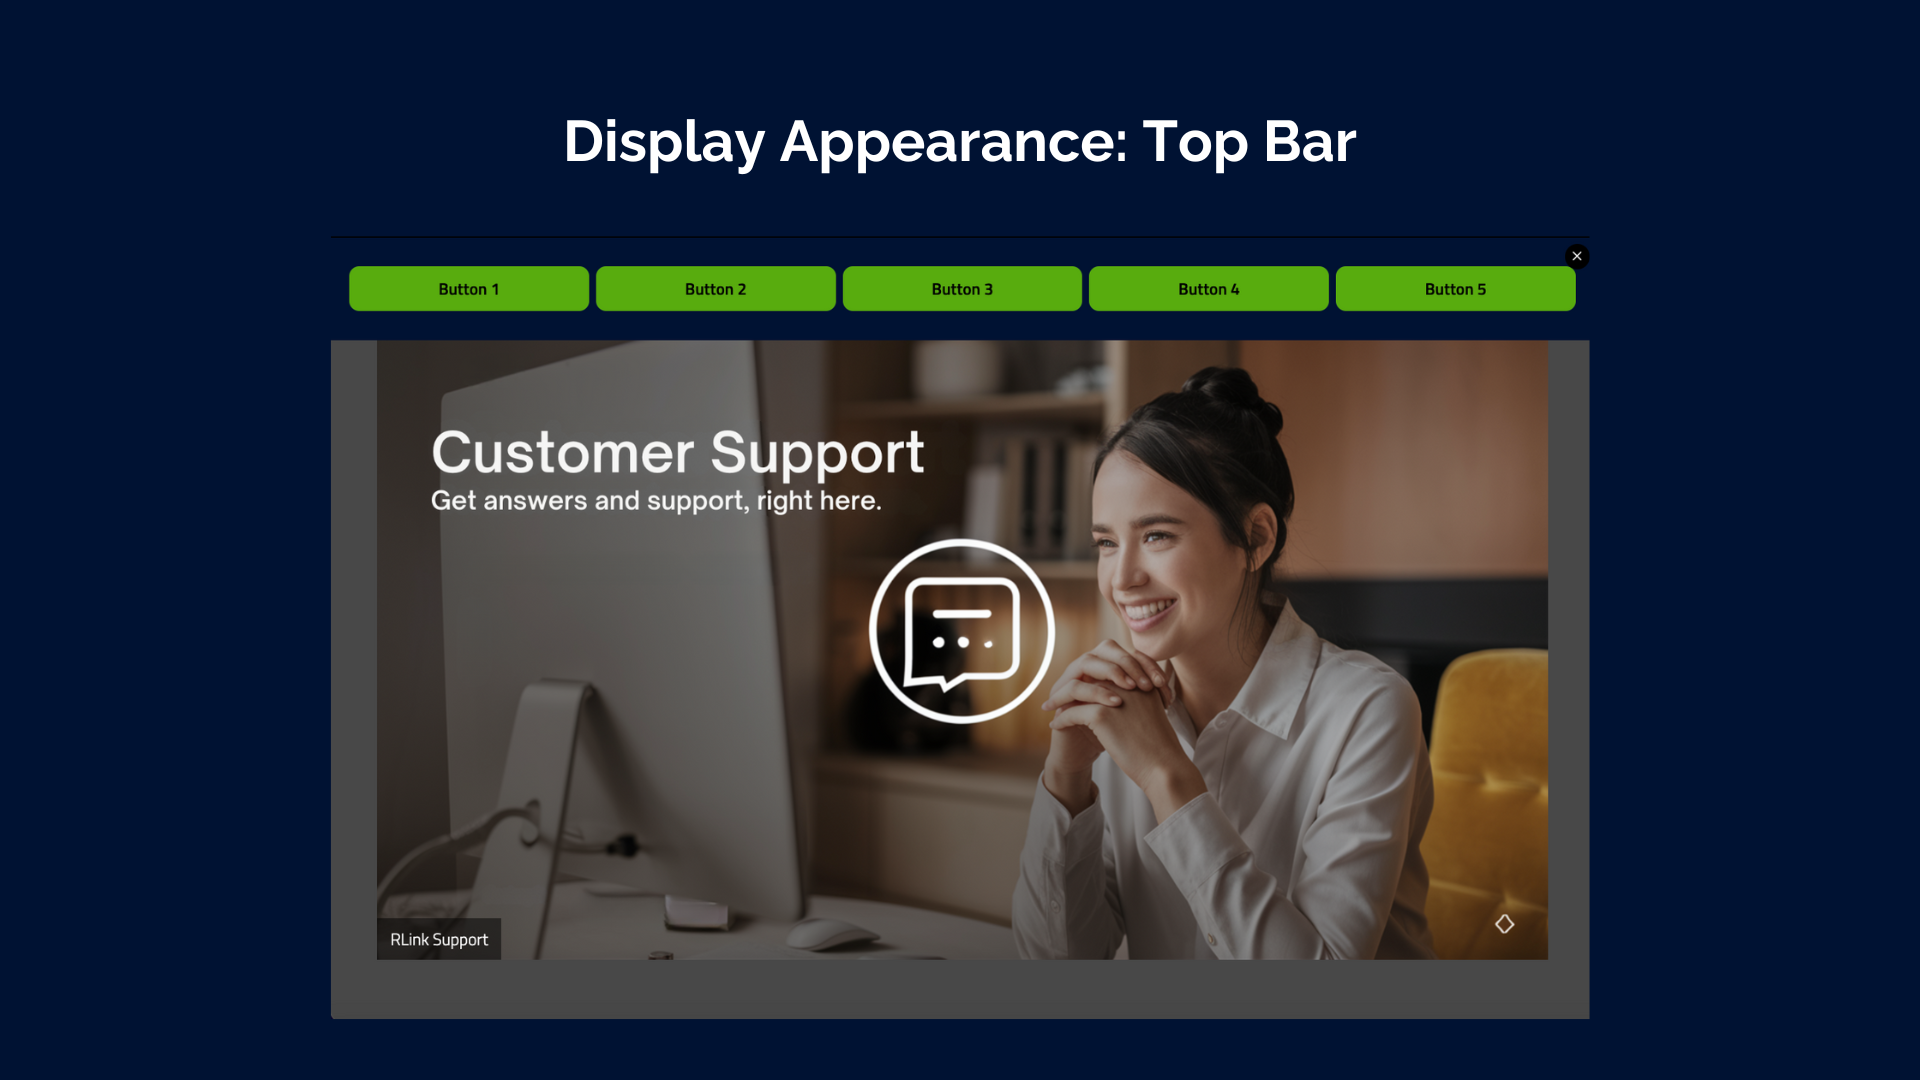
Now that you've set up your Button Bar Widget, here are some tips to maximize its impact:
Use buttons strategically: Link to relevant resources, launch quick polls, or provide easy access to important documents.
Keep it simple: Don't overwhelm participants with too many options. Focus on 3-5 key interactive elements per meeting.
Encourage participation: Use your buttons to prompt attendees to ask questions, vote on topics, or access collaborative tools.
Be responsive: Monitor button interactions and be ready to address any questions or issues that arise from their use.
Measuring the Success of Your Interactive Meetings
To ensure your interactive meetings are hitting the mark, pay attention to these metrics:
Participation rates: Track how many attendees are using your interactive features.
Engagement duration: Monitor how long participants stay active during the meeting.
Feedback scores: Collect and analyze participant feedback on the interactive elements.
Follow-up actions: Measure the completion rate of any post-meeting tasks or resources accessed via your buttons.
Wrapping Up: Elevate Your R-Link Meetings
By leveraging R-Link's Button Bar Widget and following these best practices, you're well on your way to creating meetings that are not just attended, but truly experienced. Interactive elements transform your virtual gatherings from one-way presentations into dynamic, collaborative sessions that drive engagement and productivity.
Remember, the key to successful interactive meetings is continuous improvement. Experiment with different button configurations, gather feedback, and refine your approach over time.
Ready to revolutionize your virtual meetings? Log in to R-Link today and start creating truly interactive online experiences that will leave your participants asking for more!
