How to Stream LIVE To Facebook Using RMTP
Ready to take your Facebook presence to the next level? R-Link makes it easy to broadcast high-quality live streams directly to your Facebook audience.
Here is a step by step guide on how to set up RTMP streaming for your Facebook account using R-Link:
Setting Up Your Facebook Stream
Log into your Facebook account and go to https://web.facebook.com/live/producer/
In the Go live column, toggle Create a test broadcast before going live.

Click Go Live

In the Select a video source, choose Streaming Software.

Click Copy the Stream key.

Click the drop down arrow to open the Advanced Settings right below.

Toggle on the Persistent stream key.
If this is turned on, they you can reuse this every time you go LIVE and you do not have to connect every session.

Under Server URL, you’ll see your stream key. Click Copy. You will need these to stream from R-Link.

Connecting Facebook LIVE to R-Link
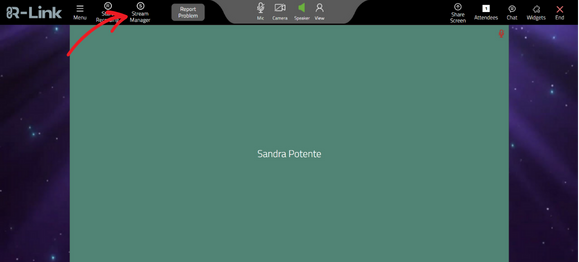
In a separate tab, go to your R-Link. Be sure to join the Meeting Mode. You cannot set-up the stream if you are in Admin Mode. Meeting URL (https://meet.r-link.com/yourroomname) and log into your room.
Click Stream Manager.

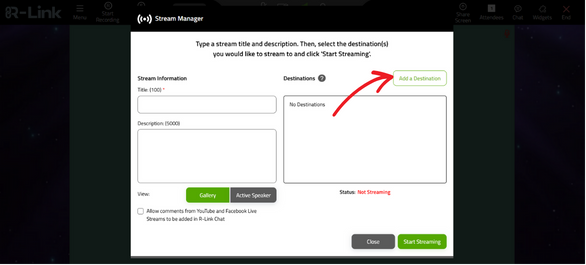
Click Add Destination.

Select Custom RTMP.

Enter your URL and Stream Key from Facebook LIVE.

Click Add RTMP Server.
Going Live
When you’re ready to go live, give your stream a Title and Select the destinations you want to include in your stream
Click Start Streaming to stream to your selected destinations.
Remember, a stable internet connection is crucial for smooth streaming. Always test your setup before going live to ensure the best experience for your viewers.
By following these steps, you'll be broadcasting your R-Link events on X in no time, reaching a wider audience with your awesome sauce!