Mastering R-Link: Your Ultimate Quick Start Guide
Have you ever found yourself fumbling through a new platform, wishing for a magic wand to make it all click? Well, consider this your R-Link magic wand! Whether you're a tech wizard or just dipping your toes into the world of online collaboration, this guide will have you hosting like a pro in no time.
Watch FULL Video below:
Welcome to Your Virtual Playground
Remember the excitement of exploring a new playground as a kid? That's exactly how you should feel about R-Link.
It's not just another boring meeting platform – it's a dynamic space where ideas come to life and collaboration knows no bounds.
Let's start with the basics. Imagine R-Link as your personal treehouse club.
How To Open Your R-Link Room
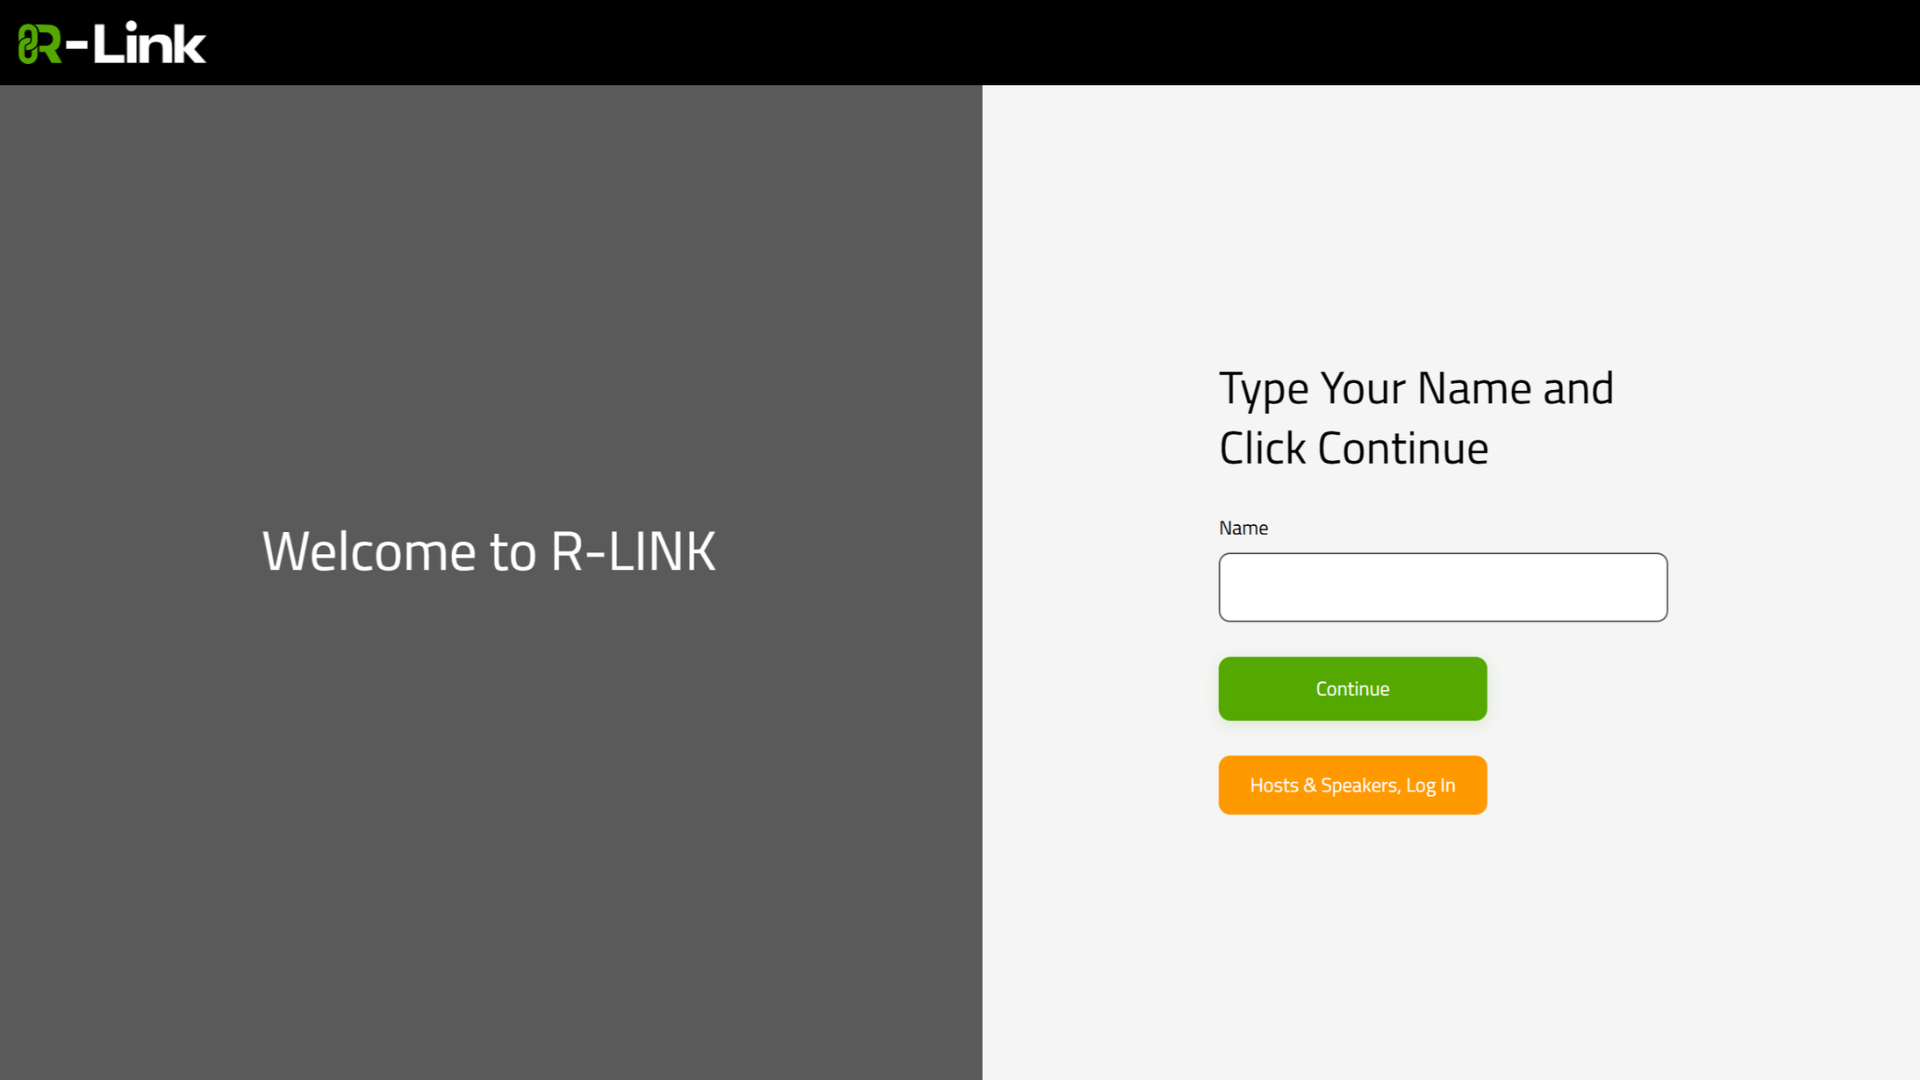
First, to enter your R-Link room, open up your favorite browser on PC, Mac, or mobile and simply type meet.r-link.com/yourroomname into your browser. Voila! You're at the clubhouse door.
If you're a guest, just knock (type in your name) and enter.
But if you're the cool kid who owns the treehouse (aka the host), click that snazzy orange "Host and Speakers" button and show your secret handshake (login).
Type in your email address and your password, and then hit join. Now you'll have a chance to connect using your computer's speakers and microphone or to dial in by phone. If you click connect by computer, you'll be asked to check your microphone, speakers, and camera. Don't skip this step; make sure that everything is working.
When you're ready, select the option to join with video or without and enter your meeting room. Don't worry, though; you can always turn your camera and mic on or off in the meeting room later.
Now you're in your meeting room. Across the top, you'll see the toolbar, and on the left, you'll see a main menu. Open the menu to get access to your account settings.
How To Invite People To Your Room
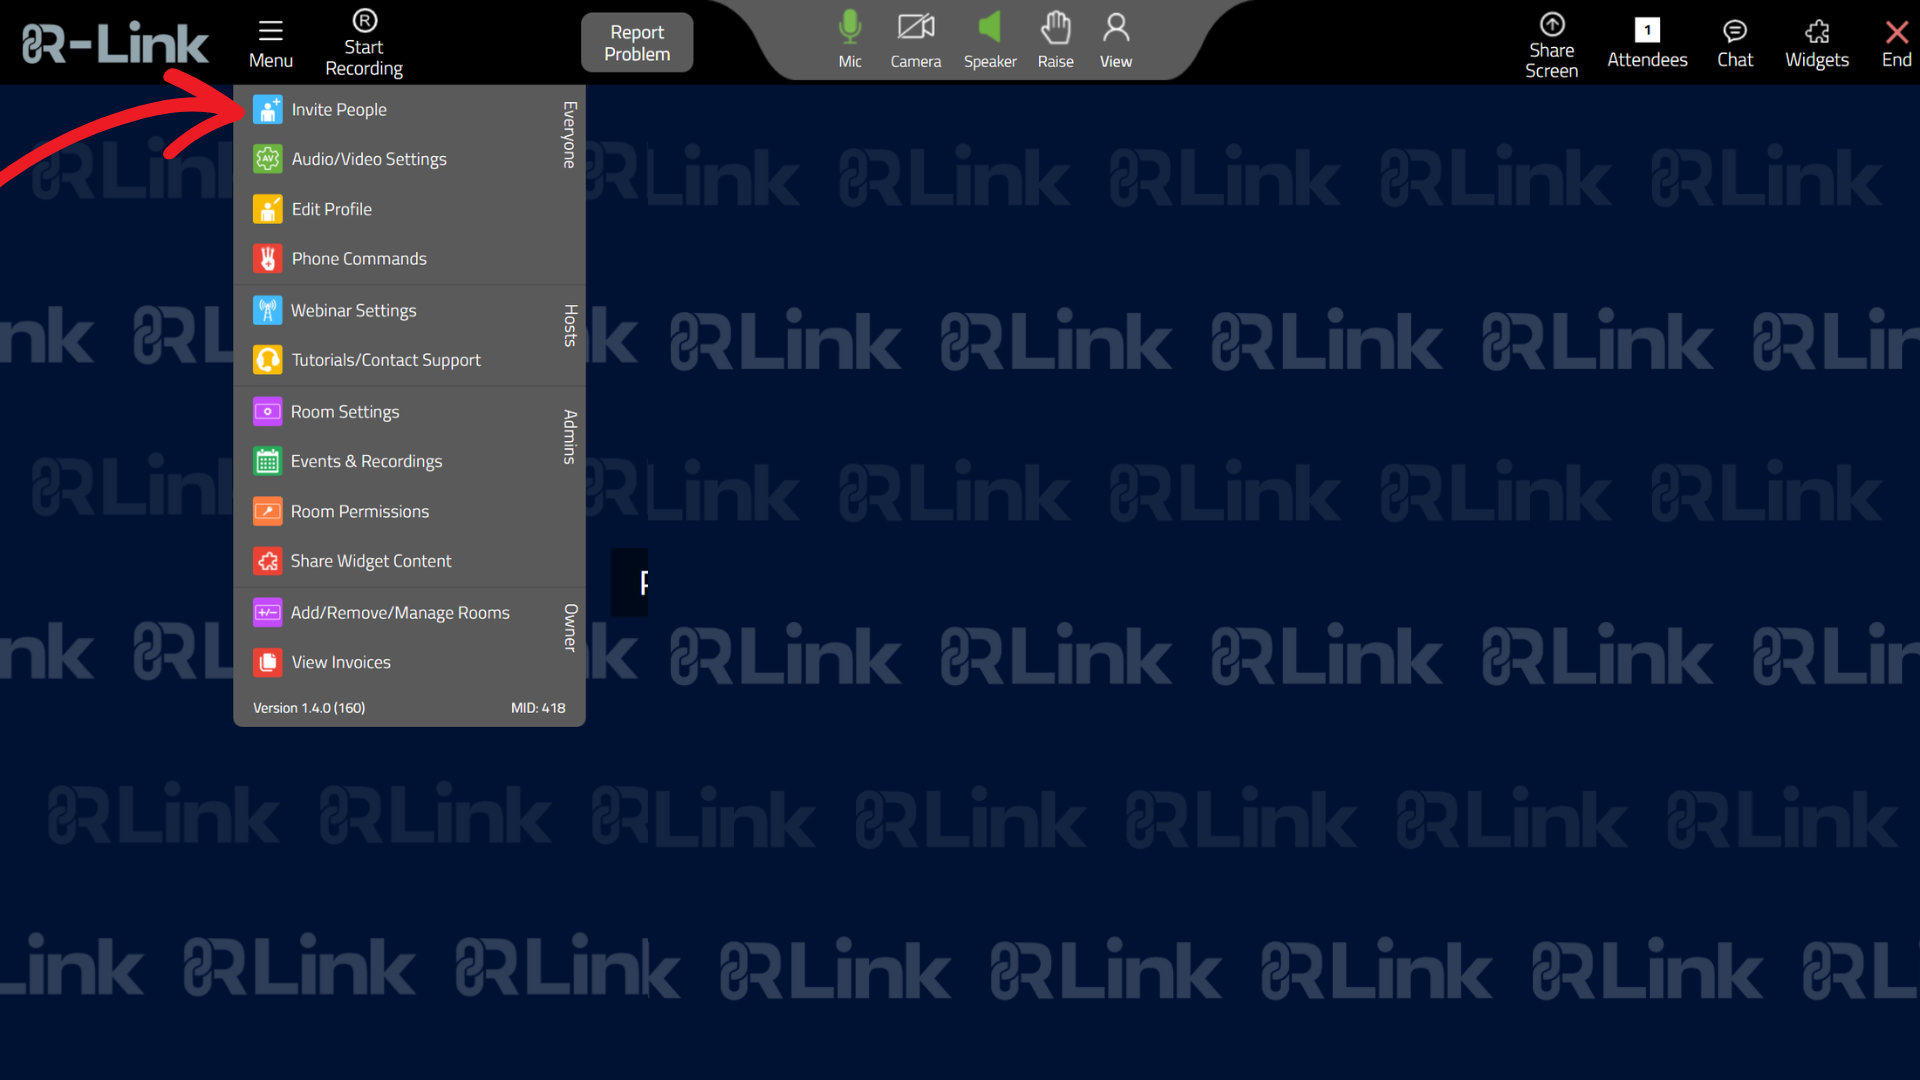
The first thing you might want to do is invite people to your room. So that's the top menu item. Click on the main menu, open up Invite People, and you'll get this pop-up to show you all the different ways you can invite people to your room. The easiest way is, of course, sharing your R-Link Web address or URL.
Room Settings
But this is also where you can get a link to invite a co-host or co-presenter to your R-Link Events. You can also update your room settings and webinar settings here. Room settings include branding, like your welcome message, wallpaper, and security pin.
Webinar Settings
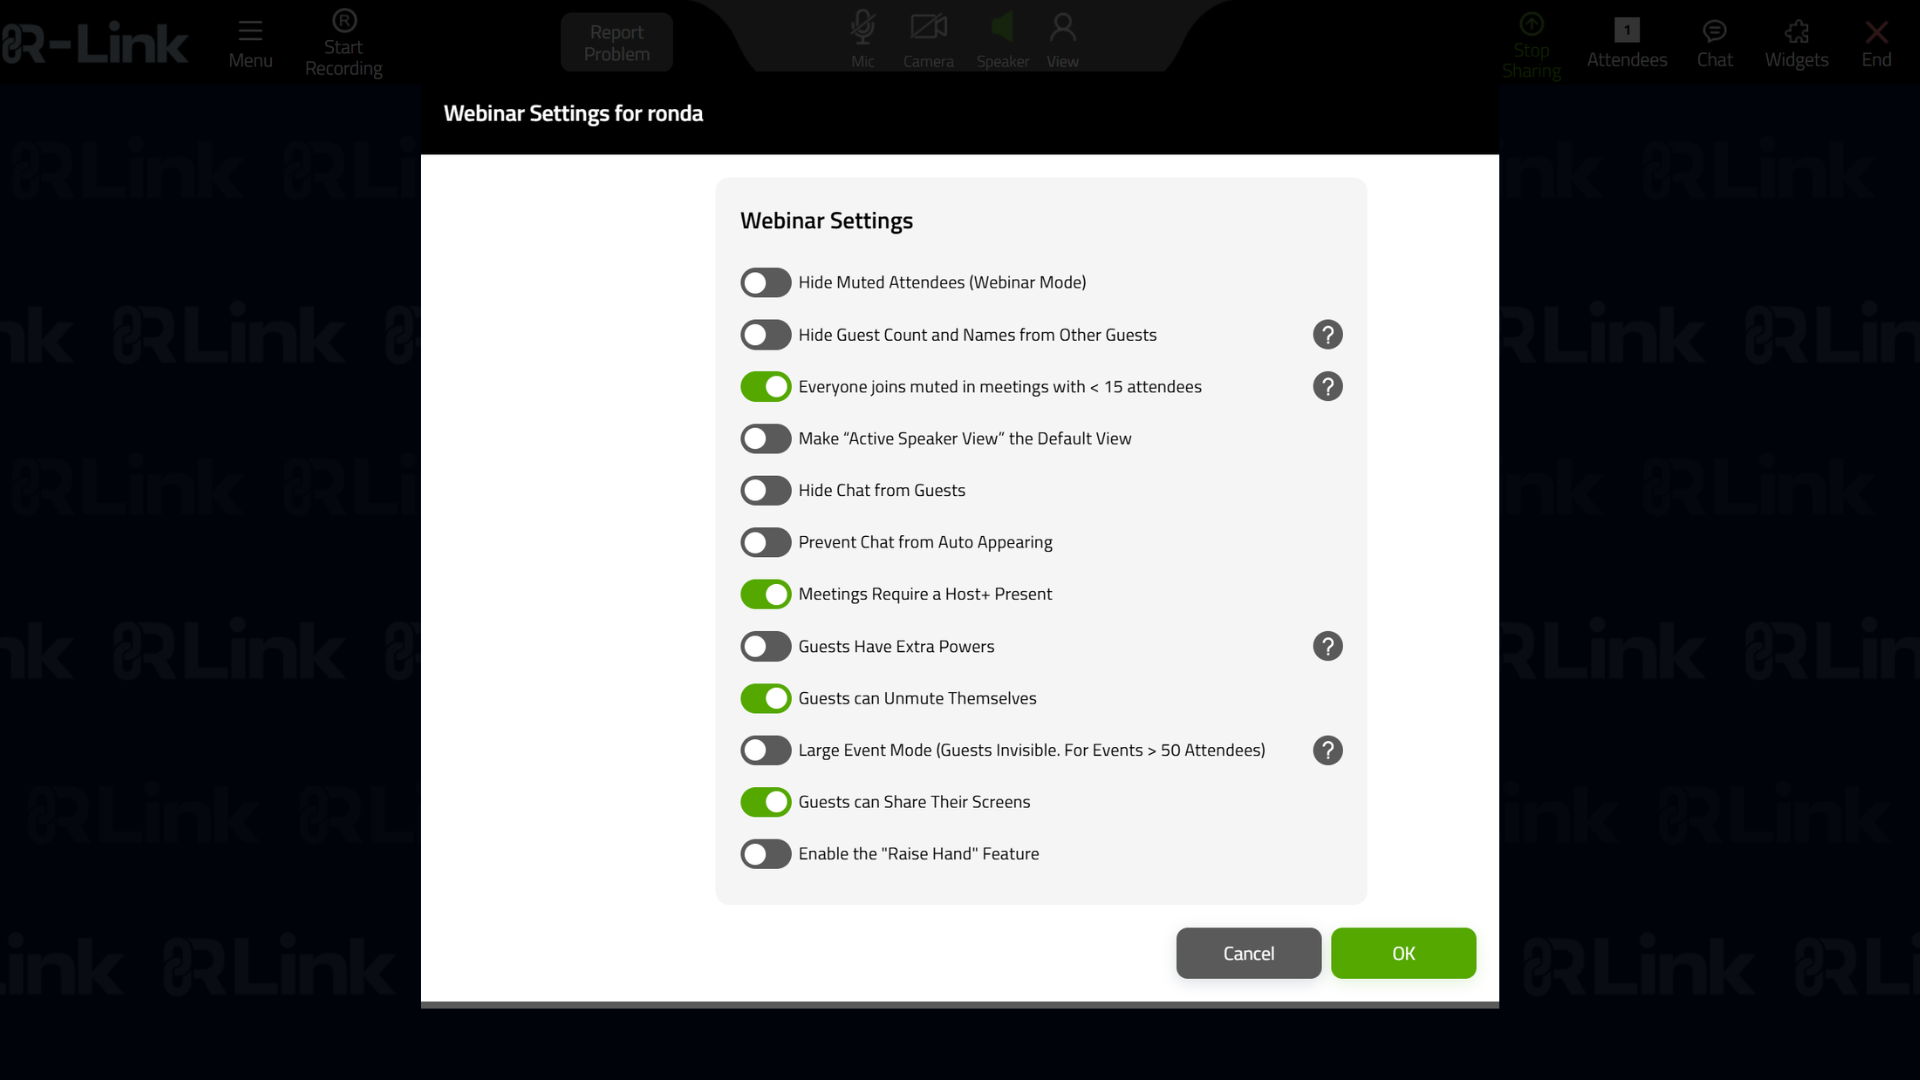
Webinar settings are available for R-Link Ultimate subscribers. They give you greater control over attendees, with options to mute guests, disable screen sharing, raise hands, and more.
Room Permissions
If you want to add members of your team as additional permanent hosts or admins, you can do that in Room Permissions. All you need is their email address, and you can update these room permissions anytime as your organization grows.
Recording Your Meetings
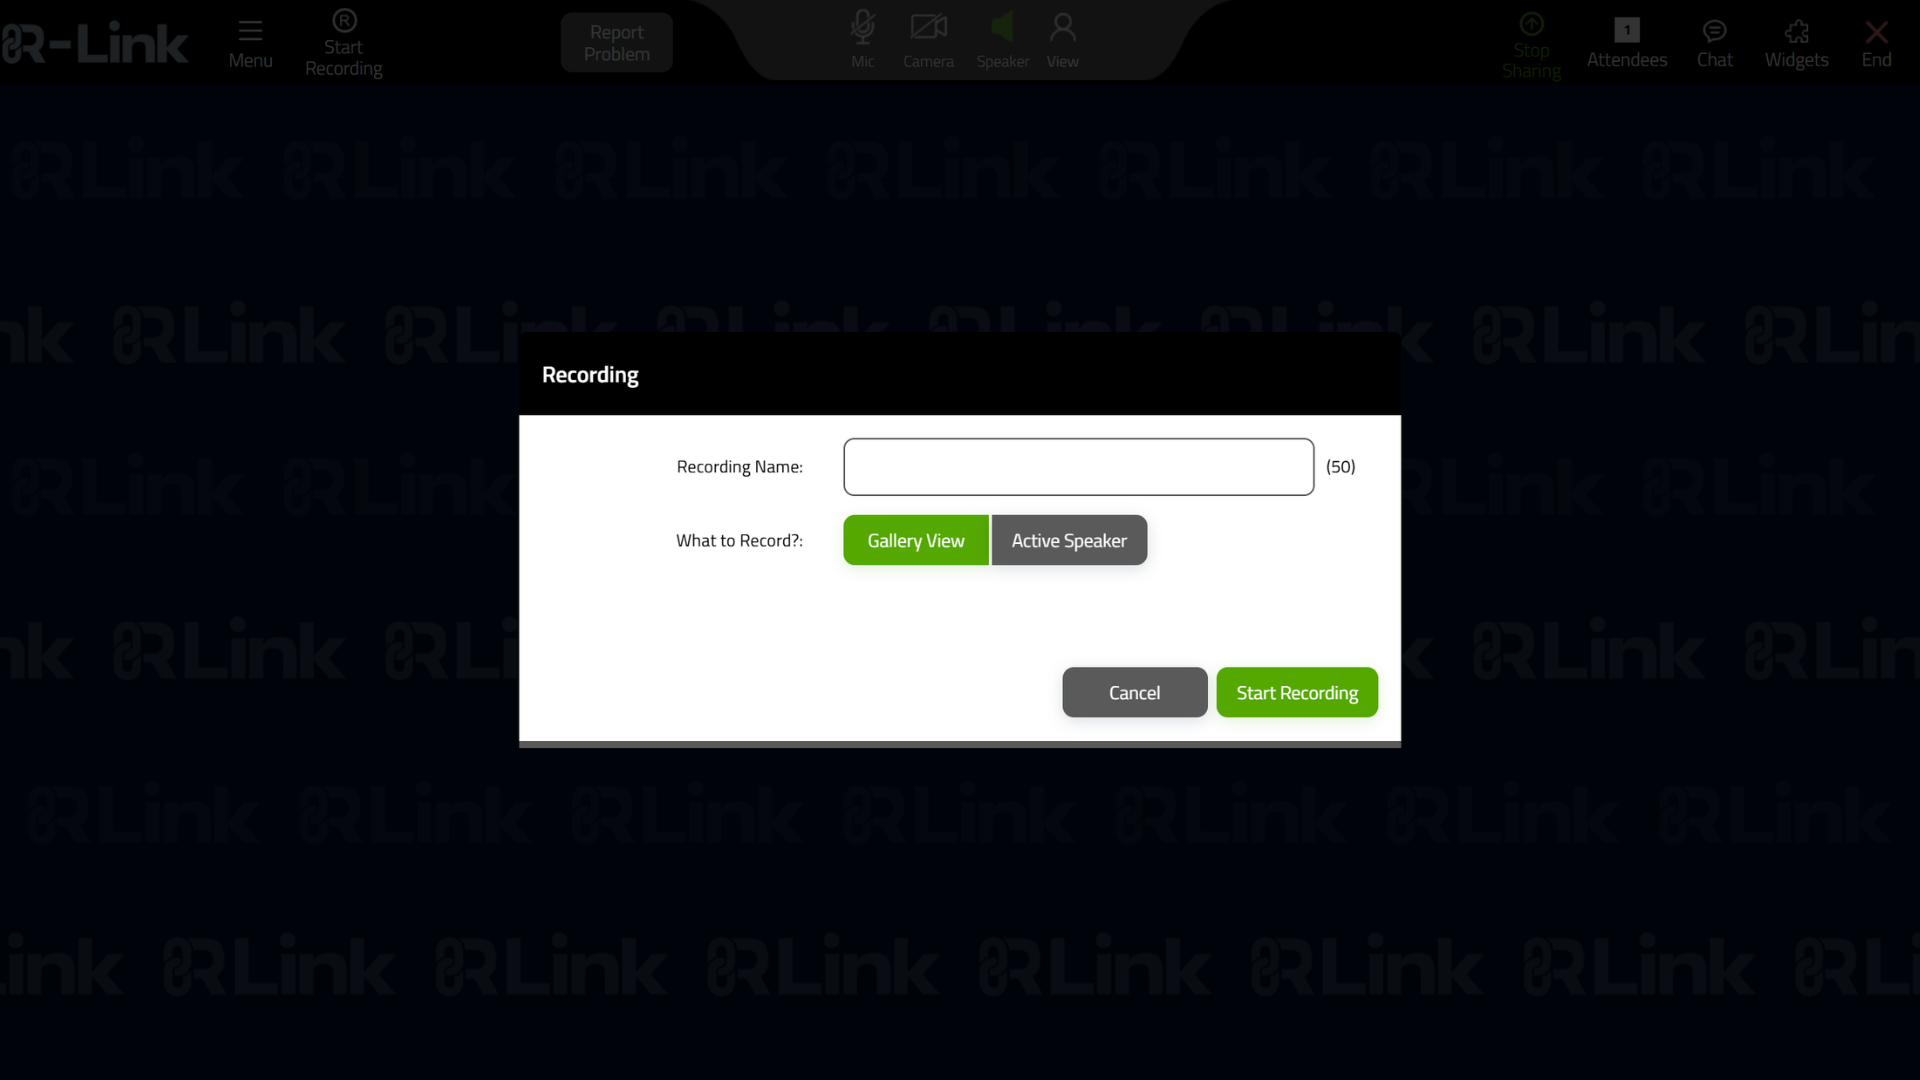
Now, let's talk about how to actually host a meeting. If you want to record your meeting, just click start recording on this top toolbar. On mobile devices, you'll find this in the meeting menu. Enter your recording name and select gallery view or active speaker, then start the recording.
Live Streaming
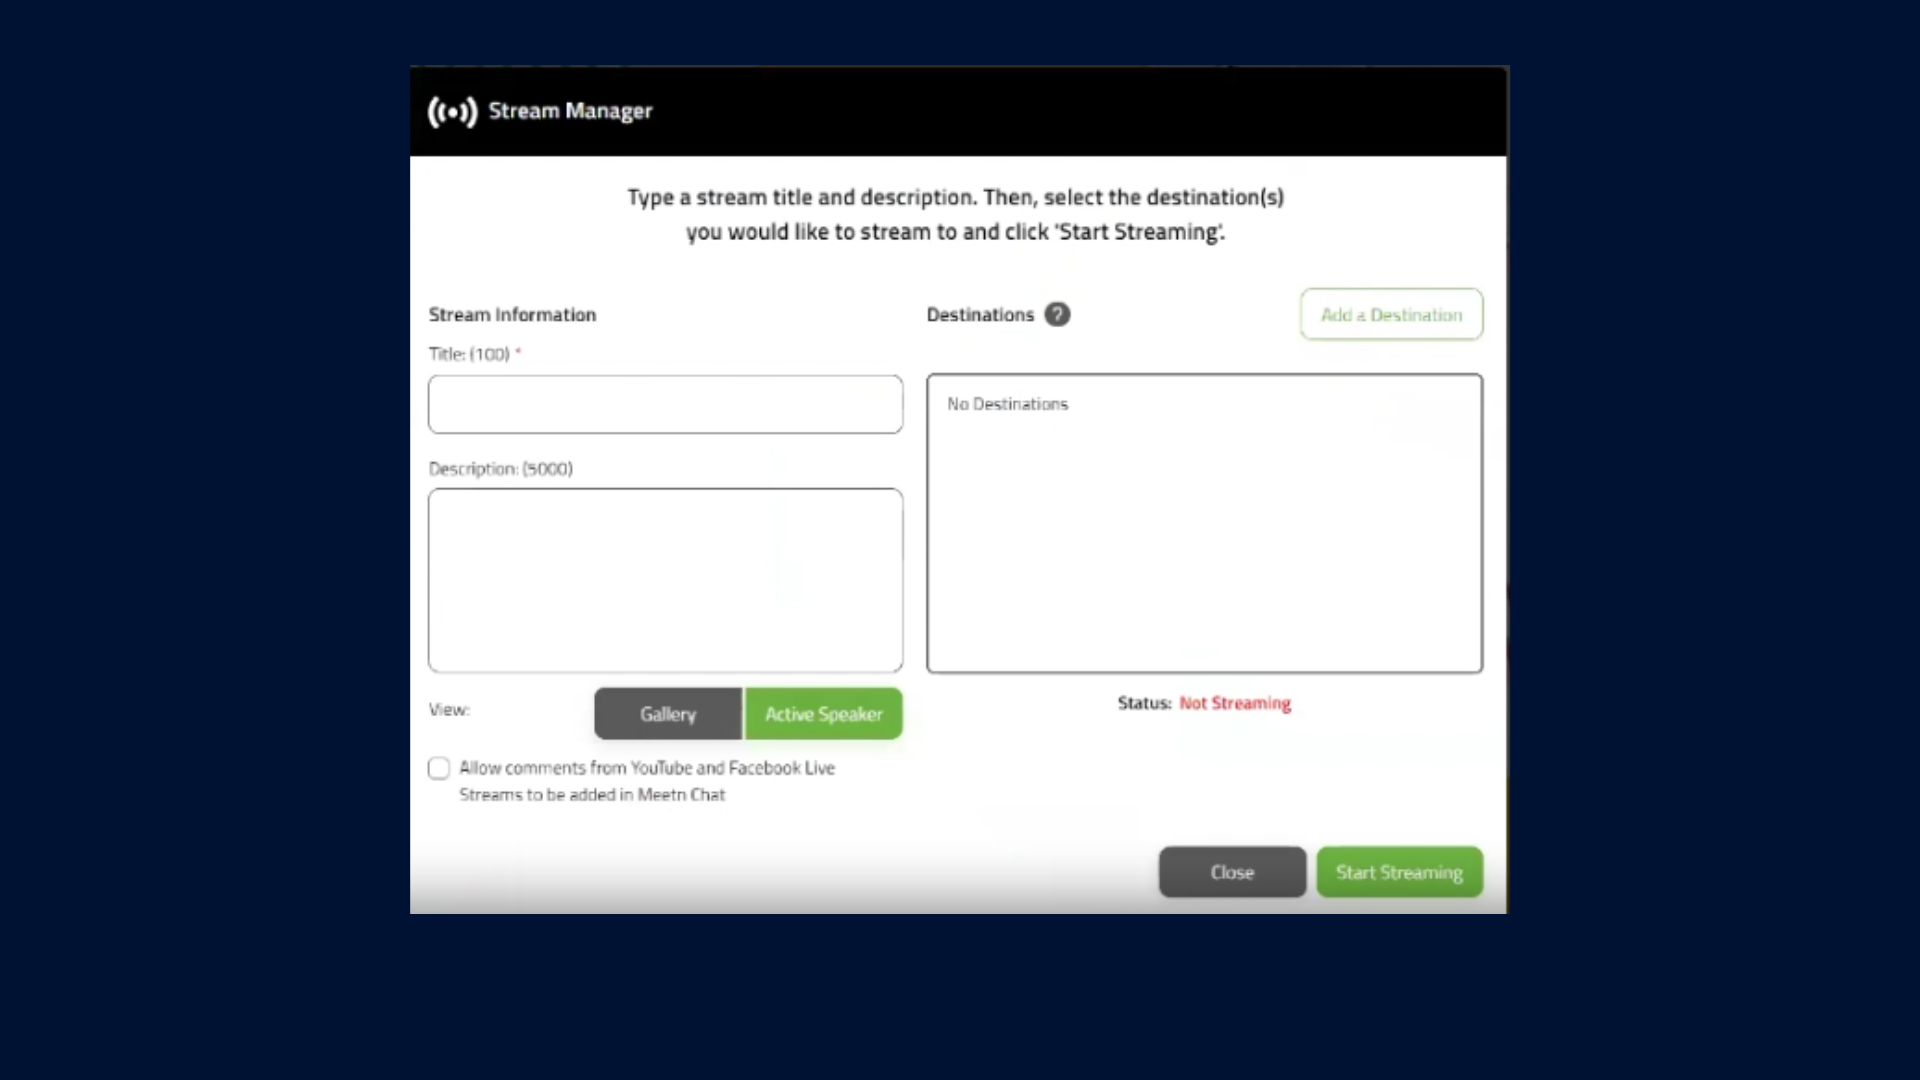
If you want to stream out to Facebook or YouTube or any other social media platform, click on the stream manager to add your social media profiles.
The number of simultaneous live streams you can have at any given time depends on your subscription level.
View Options
In the middle of the toolbar are your device and view options. You can turn on or turn off your microphone, your camera, or your phone, or your speakers with one click. You can also raise your hands, or you can change your view and turn on live captions or live translations.
Muting & Unmuting Your Guests
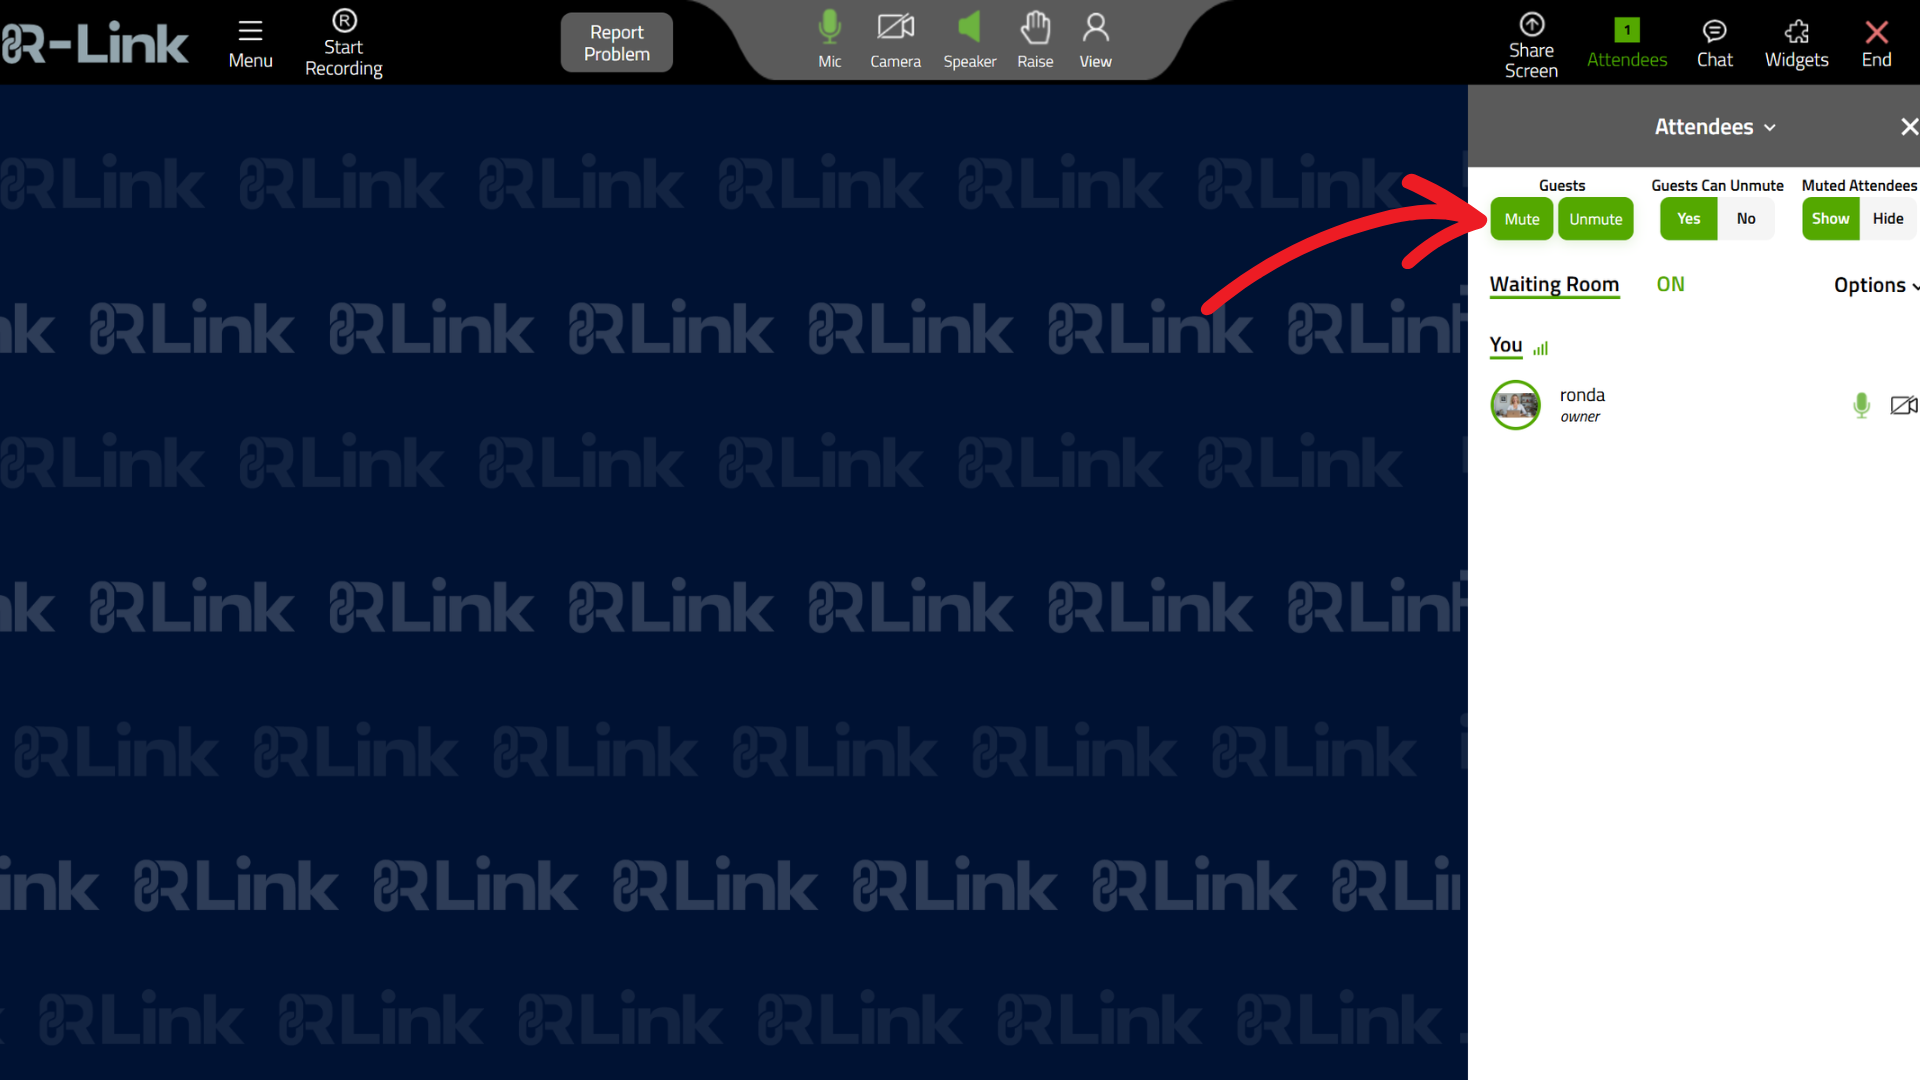
All the way to the right are your meeting controls. If you open up your attendee tab, you'll see a couple of buttons across the top. The first option lets you mute or unmute all of the guests in your room. The second option lets you control whether guests have the ability to mute or unmute themselves.
Show or Hide Muted Attendees
And finally, on the right, you can choose to show or hide muted attendees. This comes in handy in large meetings or presentations and lets you hide muted attendees to keep the focus on speakers who are actively talking or sharing. The waiting room option lets you manage who can enter your room. Turning on the waiting room gives you the chance to compare your notes and agenda with fellow hosts before letting in your guests.
Meeting Chat & Sharing Your Screen
You can also open up chat. Here you'll have options for public, private, or host-only chat. And of course, R-Link lets you share your screen or your desktop.
Widgets & Folders
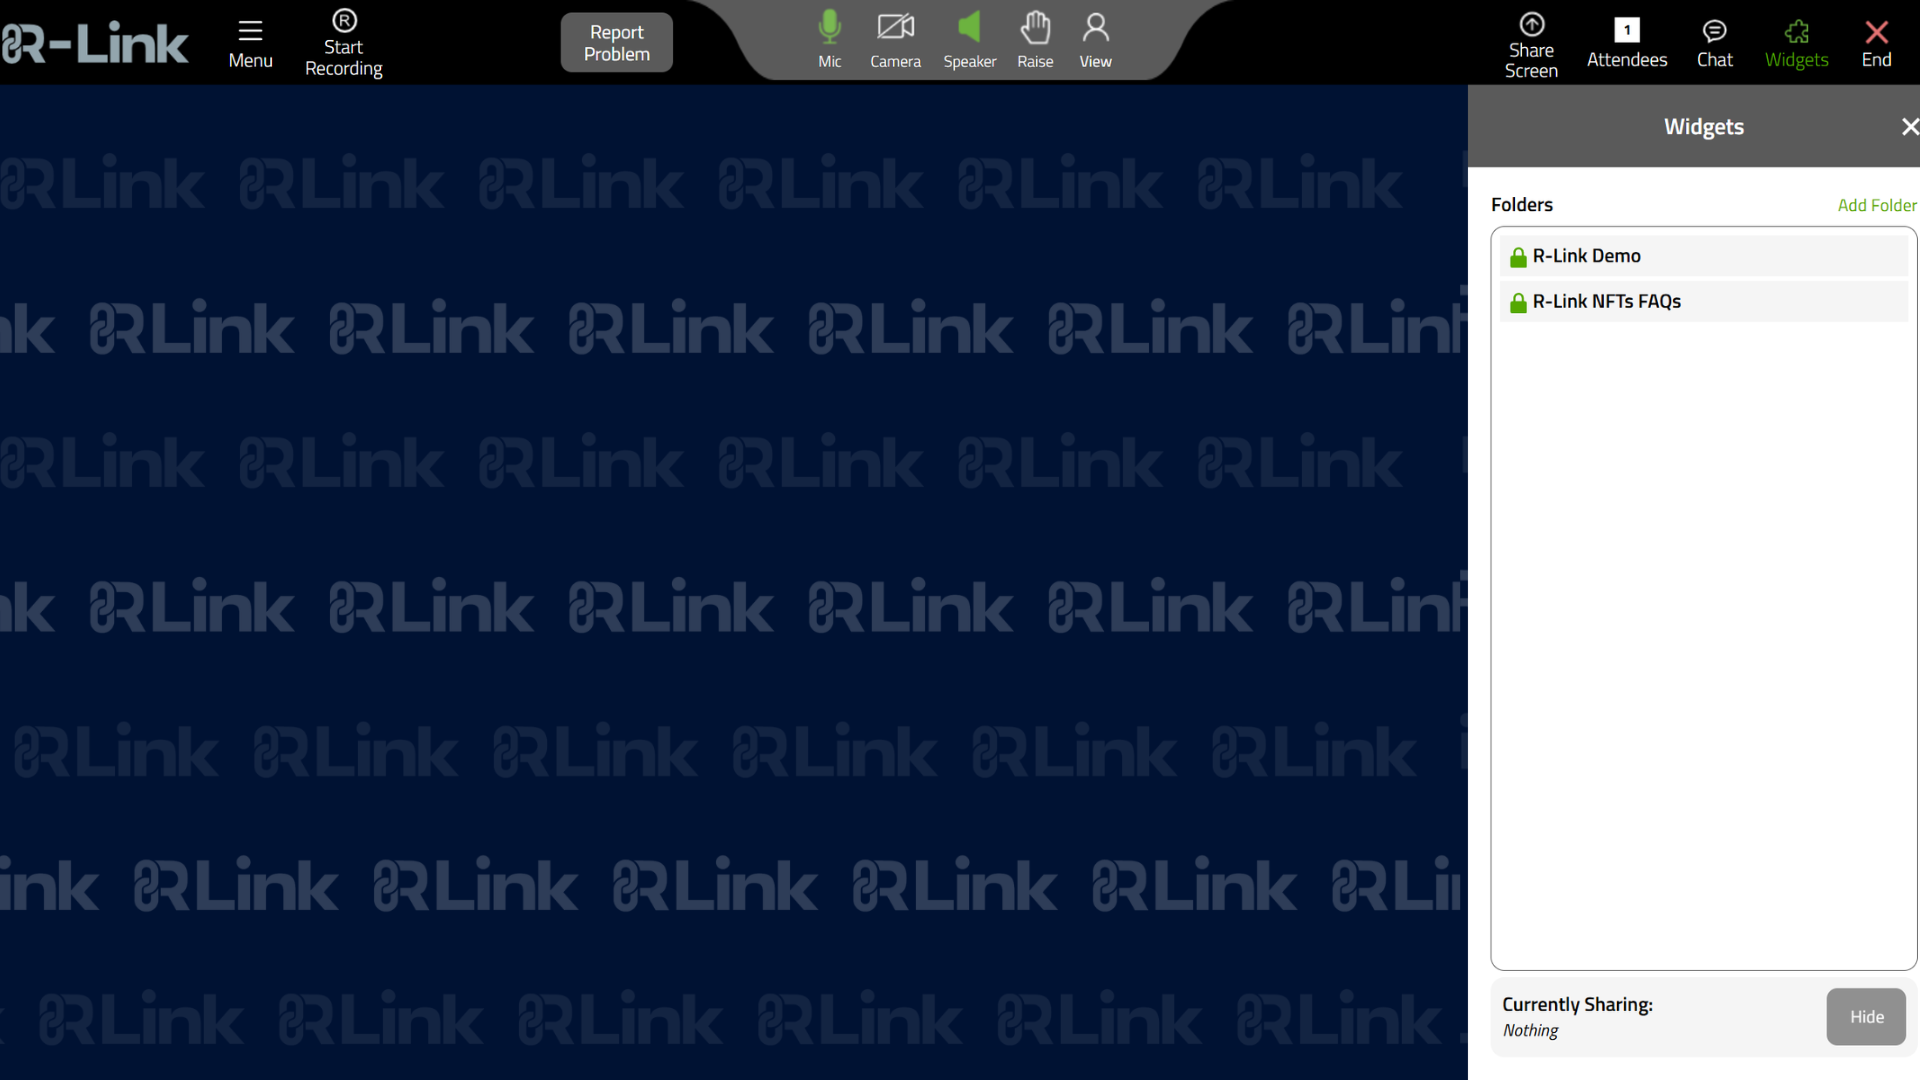
And then we get to the best feature of R-Link, the widgets. Widgets let you create and upload presentation materials to the cloud to use on any device.
You can create a folder and then upload slides and videos and presentation materials to share with your guests. You can also create your own widgets, pop-ups, presentation notes, and more.
Widgets let you store all the visual aids and resources that you might want to use in an R-Link meeting, and they're available to all paid R-Link subscribers.
Read my post about Widgets & Folders and learn how to use them to promote your products, services, or links, or to share media files and documents with one click.
Final Thoughts
Now you're ready to host your first R-Link meeting. If you need help or you encounter technical issues, you can click the report problem button on the top toolbar where you can submit an anonymous report or email the team at [email protected].